

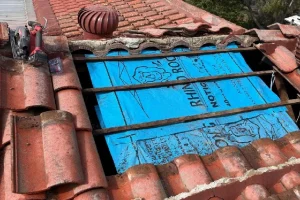
Clay tile roofs are some of the most attractive roofs around Auckland, and some of the most misunderstood when it comes to leaks. A cracked terracotta tile does not always leak straight away, and a leak does not always come from a cracked tile.
Step 1: Note When the Leak Appears
Does it show only in heavy rain, in wind from a certain direction, or every time it rains? Wind-driven leaks often point to ridges, flashings or lifted tiles. Constant leaks often point to a broken tile or blocked valley.
Step 2: Check From Inside First
If you can safely access the ceiling space, look for water stains on timber, damp insulation or daylight through tiles. Water travels along timbers, so follow the trail uphill.
Step 3: Look From the Ground
Use binoculars or a phone camera zoom to look for cracked or slipped tiles, missing ridge pointing, or debris in valleys and spouting. Avoid walking on clay tiles yourself, as they crack easily and roofs are dangerous.
Step 4: Common Fixes
- Replacing cracked or broken tiles
- Re-laying slipped tiles
- Re-bedding and re-pointing ridge caps
- Clearing or replacing valley irons
- Repairing flashings at walls and chimneys
Step 5: Call a Roofer for a Lasting Repair
A professional repair finds the actual entry point and fixes it with the right materials. Get in touch and we will inspect your clay tile roof and quote the repair.
Published 28 August 2026